

We all have laptops, notebooks, or Macs with the same boring colour, but we never thought of beautifying them with stickers. Stickers make our devices beautiful and show our personality to others, and we may end up meeting people with the same interests just because of the stickers on the laptop. In this article, we will discuss how to put stickers on a laptop.
My Experience:
When I bought my Dell laptop, it looked too plain, so I decided to decorate it with vinyl stickers. I cleaned the surface with rubbing alcohol first, then slowly applied the stickers using a credit card to avoid air bubbles. Honestly, it was a fun process, and the best part is that even after a few months, the stickers still look new and didn’t damage the laptop’s finish. Therefore, it is a good idea to apply stickers on your laptop.
Do This Before Putting Stickers On The Laptop
Applying stickers on the laptops is fine as it shows your style and your interests. However, if you take care of the preventive measures, it would be easier for you to remove them. You should consider a few points before putting stickers on the laptop.
Clean Your Laptop
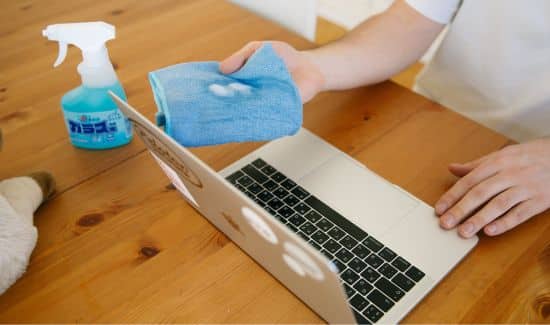
Before applying any sticker, it is mandatory to clean the laptop’s surface as if it remains uncleaned. The dust or debris will also stick to the stickers, impacting their adhesion.
For safe cleaning practices, refer to HP’s official advice on laptop surface care.
I tried to clean the surface area of the laptop with rubbing alcohol to remove all the dust and debris. Dip a cloth in the rubbing alcohol and gently clean the outside area of the laptop. If you want to apply stickers on the inner side of the laptop, clean that as well.
Take Extra Care While Applying Stickers
Stickers contain adhesive on the other side to get stuck to the surface. The adhesive side has the waxed paper liner, which must be removed before applying to any surface. You must remove the waxed paper liner, put that sticker on the surface area and apply pressure. While doing this, some air bubbles can form, which you can easily remove using your thumb or credit card.
How To Buy Stickers For The Laptop
It is important to consider these points, which will help you choose the right sticker for your laptop. If you’re not sure which material suits your laptop surface, check Sticker Mule’s guide to sticker materials.
Choose the Best Colour Theme
First of all, sketch the design in your mind that you want to purchase for the laptop. You must choose appealing colours that match or contrast each other to make a beautiful design. Also, purchase those stickers that go with your laptop material. You can look for plastic or vinyl-covered stickers.
Group Them By Size
That is fine if you want all your stickers to be the same Size. However, multi-size stickers give an appealing look and are also eye-catching. You can use the big-size stickers on each side of the laptop.
Arrange Stickers by Shape
You can choose multiple shapes as they give the viewer an aesthetic sense. You can purchase unique shapes for the center points or eye-catching points so that they can grab everyone’s attention.
How to Put Stickers on a Laptop
Now, this is when your homework is completed, and you will do something practical. You have to arrange all the stickers in one place along with the laptop and necessary items and follow the steps below.
Clean The Laptop Surface With Alcohol
First, you have to take a cotton piece, dip it into rubbing alcohol and rub it all over the laptop surface to remove all the dirt and dust. This process will help the stickers to stick efficiently with the laptop. You may read Laptop Mag article on cleaning the laptop surface.
Peel the Back Side Of Stickers
Now you have to gather all those stickers in one place which you want to apply first. You have to peel the back side of the stickers so that you can apply them on the laptop.
Choose the Place Where You Want to Apply Stickers
It is time to decide whether you want to apply stickers only on the back, front, or both sides. However, do not try to apply stickers on sensitive laptop parts like the touchpad, screen, keyboard, or ports.
Applying the Stickers
As you have chosen the place, it’s time for the stickers to be stuck on the laptop surface. Now, gently apply the stickers over the chosen place. Make sure you are applying the stickers in the right direction.
I’ve found that using slightly thicker stickers (vinyl decals) makes placement easier, because they hold their shape. After all stickers are applied, press firmly around the edges of each sticker so it bonds well to the metal or plastic surface.
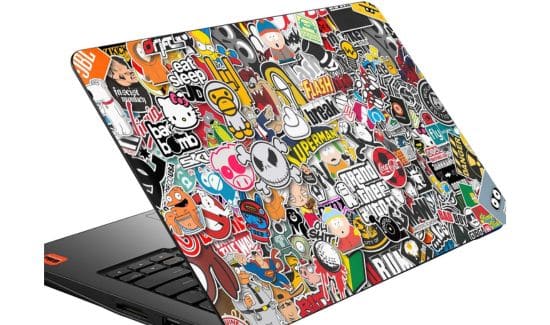
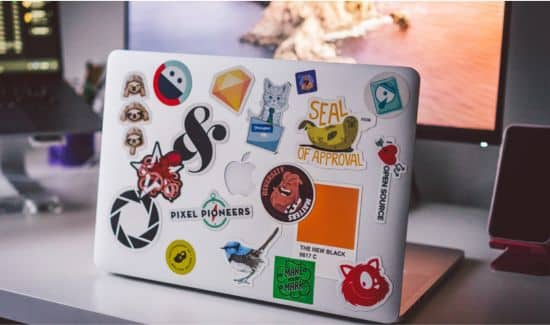
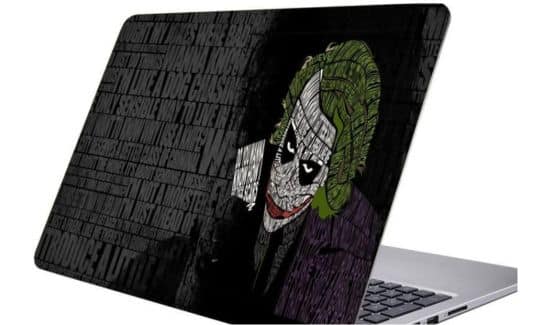
Laptop Sticker Ideas
How to Remove Stickers Safely
If you ever want to remove your stickers, use a hairdryer on low heat for 20–30 seconds to soften the adhesive, then gently peel it off. Wipe the area with rubbing alcohol to clean any residue.
Author’s Note: We test simple DIY tech ideas and share what truly works. Our goal is to give honest, easy-to-follow advice that actually helps you personalize your tech safely.
Conclusion
In this article, we discussed the preventive measures which should be taken before putting the stickers on the laptop. Afterwards, we discussed how to purchase the best stickers for your laptop. At the end of the article, we talked about how to put stickers on the computer. You may also read about where is the power button on Asus laptop.
Frequently Asked Questions
Q1. How should I prepare my laptop before decorating it with stickers?
Decorating a laptop with stickers can be fun, but it takes care to avoid damage. First, clean the laptop surface thoroughly. Use a mild mixture of isopropyl alcohol and water on a soft cloth to remove fingerprints and dust. LaptopMag specifically recommends this alcohol-based cleaning, as it disinfects surfaces and removes oils. Clean both the screen and the outer lid where you plan to stick decals.
Q2. How do I plan the sticker layout on my laptop?
Once dry, plan your sticker layout. Decide which designs you want and where they’ll look best. For example, place larger stickers in the center or off to corners (avoiding vents or logos), and use smaller decals to fill gaps. Taking a quick photo of the laptop before you start can help visualize the arrangement.
Q3. What’s the best way to apply stickers on a laptop?
Apply the stickers carefully:
- Peel off the backing of the first sticker, exposing its adhesive side.
- Align it gently over the chosen spot.
- Starting from one edge, press the sticker onto the laptop and smooth it out with a credit card or fingernail to avoid air bubbles.
- Continue applying remaining stickers in the same way.
- If any bubbles form, lift the sticker edge and repress, or use a pin to gently release the air.
Q4. What kind of stickers work best for decorating a laptop?
I’ve found that using slightly thicker stickers (vinyl decals) makes placement easier, because they hold their shape. After all stickers are applied, press firmly around the edges of each sticker so it bonds well to the metal or plastic surface.
Q5. Are there any extra tips to protect stickers or prevent laptop damage?
Some people use a clear protective skin over their design to prevent peeling or scratching. Also, avoid placing stickers on cooling vents or the bottom of the laptop, as it can interfere with airflow. After decorating, let the laptop rest overnight before closing it or carrying it. This ensures the adhesive fully bonds.
Last Updated on 1 November 2025 by Misbah Arif

Misbah Arif is a Computer Science graduate and tech reviewer with over five years of experience in laptop hardware and performance testing. As the editor of SavvyLaptop, she focuses on real-world laptop reviews, covering battery life, usability, and value for money. Her goal is to simplify tech decisions through honest, hands-on insights that help readers choose the best device for their needs.
3 thoughts on “How To Put Stickers On A Laptop”