
Gateway laptops aren’t trendy nowadays, but some people still use them. They need to figure out how to take screenshot on them and capture the screen.
If you aren’t sure how to take screenshot on a gateway laptop, don’t worry because this blog will significantly help you with how to do so.
Having said that, if your gateway laptop is facing issues with the battery, you can read our guide on how to charge the laptop battery externally.
Before starting, let me tell you there are a few ways you can take a screenshot –so after reading the blog, go ahead and choose the one way that works for you.
4 Ways to Take a Screenshot On A Gateway Laptop
Taking Screenshot Through a Tool

Before taking a screenshot through a professional screenshot tool, you need to download the EaseUS RecExperts tool. Once downloaded, you must select the ‘Full Screen’ or ‘Region’ options. Full screen is for when you want to take a picture of the whole screen (you can also choose the display option if there is more than one display). Choose a region if you want to take a partial screenshot of the screens.
After selecting your display option, you need to click on the camera icon on the far right of the screen.
As soon as you press it, the tool will take a picture (if you are capturing the full screen) and give you the option to size your target region for a screenshot if you select the region. Afterward, pressing the camera icon again ensures the screenshot is captured.
Now, go to recordings and then to pictures to find and view your Gateway screenshot.
Take a Screenshot with a Print Screen Key
This option is for those who don’t want to download a third-party tool and want to take a screenshot from the built-in options.
If you want to take a screenshot on a Gateway laptop, you can use a shortcut the laptop gives you. It doesn’t matter if your laptop runs on Windows 11, 10, or even Windows 7; this option will work smoothly to get a screenshot.
However, the only problem is that you can’t resize the region according to your desire when taking a screenshot –you can only take a picture of the whole page.
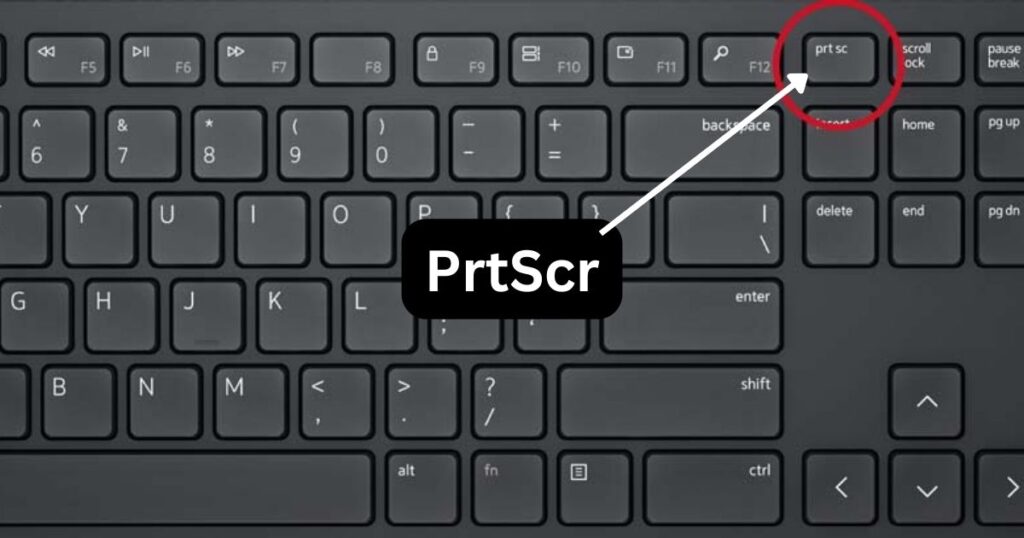
So, look for the ‘Print Screen’ or ‘PrtScn’ button on your keyboard, and once you do, click it. Your screenshot will automatically be saved on your clipboard as soon as you click it. You won’t be notified of capturing the screenshot, but it will be on your clipboard.
All you need to do is Ctrl+V on any document so you may see that the screenshot is taken. You can edit and save it from there.
Taking Screenshots with a Snipping Tool
If you are still wondering how to take a screenshot on your Gateway Laptop, there is yet another way to do it. Every laptop has a built-in snipping tool in it. This tool allows you to either take a picture of the whole screen from a shape in which you want to take a picture or even use a pen to draw on it after capturing.
I tested snipping tool on my own Gateway NE56R laptop running Windows 10 and found that Snipping Tool is the easiest for quick captures — especially when editing screenshots for tutorials.
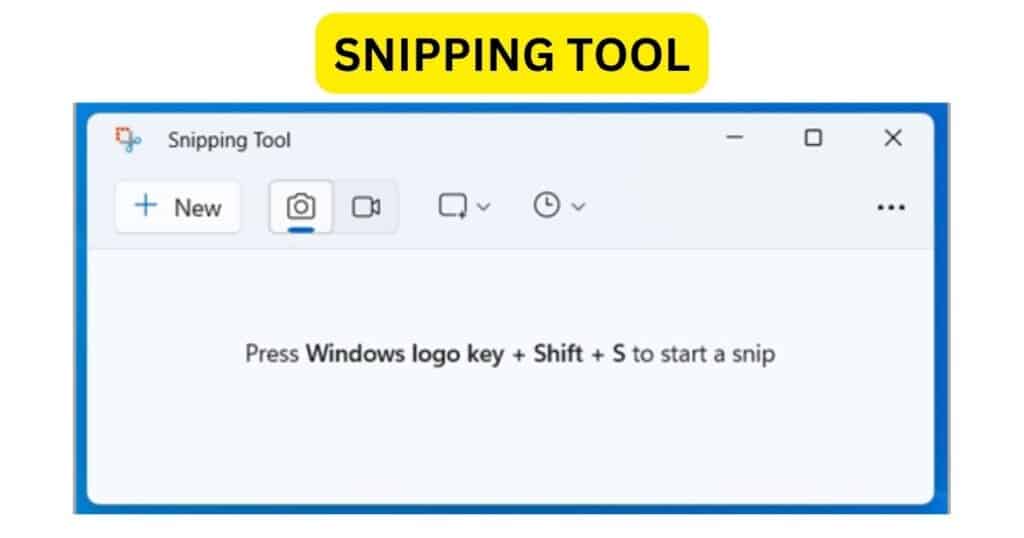
To access this tool all you need to do is to open the ‘Start Menu’ and search for ‘Snipping Tool,’ open the tool, and then click on ‘New’ with a scissor sign next to it.
Next to the ‘New’ option, you will find the ‘Mode’ option, where you can select the shape in which you want to take the screenshot. After taking the screenshot, you can edit, zoom, or save it according to your requirements.
Taking a Screenshot with the Xbox Game Bar
Last but not least, you can take screenshot on a Gateway Laptop with the help of the Xbox game bar. It can work on your Windows 10 or Windows 11 laptop. Apart from screenshots, the Xbox game bar also allows you to record your screen with audio.
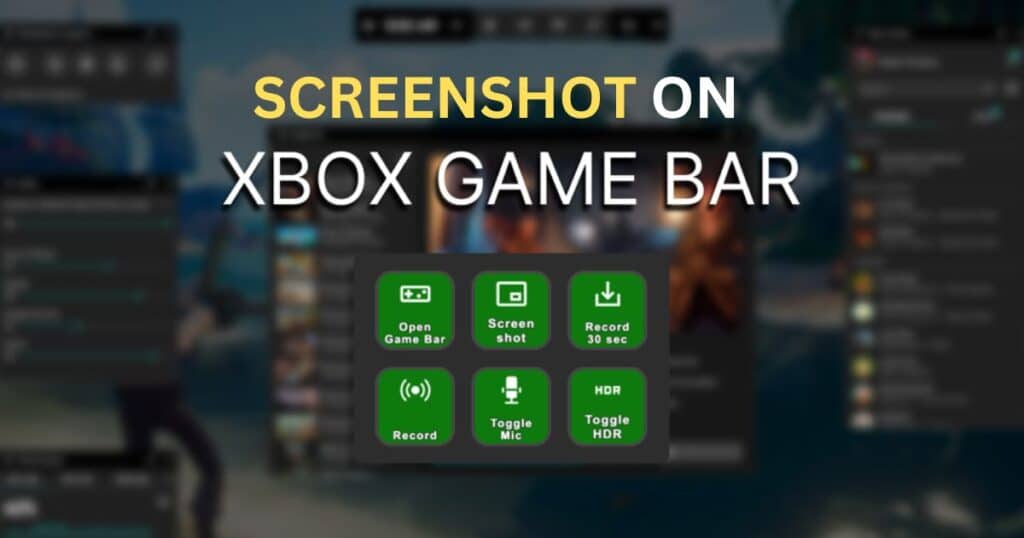
How can you take a screenshot with the Xbox game bar? Press the ‘Windows icon + G’ at the same time so that the Xbox game bar opens.
On it, search for the camera icon near the ‘Capture’ bar. Afterward, when you click on the camera icon, you can take a screenshot of your current screen.
The best thing about it is that once you take the screenshot, you will also receive a notification.
In my use, Win+Shift+S is fastest for a quick region snap, while PrtScn+Paint is good for full-screen grabs.
Always remember to save the image after copying!
I have also written a detailed guide on whether a laptop is necessary for freelancing — do check it out.
Comparison Table
| Method | Works On | Pros | Best For |
|---|---|---|---|
| Print Screen | All Windows versions | Simple, quick | Full-screen captures |
| Snipping Tool | Windows 7–11 | Custom regions | Editing screenshots |
| Xbox Game Bar | Windows 10–11 | Notifications + screen recording | Gamers & streamers |
| EaseUS RecExperts | Windows 10–11 | Full control, audio & video | Tutorials & reviews |
Final Words
Now that you have explored four ways to take screenshot on a Gateway laptops, you can choose the one that seems the easiest and most convenient for you. It doesn’t matter whether you use a third-party tool or the “PrtScn” option –you will get the same result every time.
After taking your screenshot, you can use it wherever you want and edit it according to your liking. So, try one of these ways to take your first screenshot on a Gateway laptop.
Frequently Asked Questions
Q1. How can I take a screenshot on a Gateway Windows laptop using a keyboard shortcut?
A. Press Windows + Shift + S. The screen will dim and a small toolbar appears. Drag to select the area you want to capture (rectangle, freeform, window, or full-screen). The screenshot is copied to your clipboard; paste it (Ctrl+V) into Paint or a document to save it. This uses the built-in Snipping Tool overlay.
Q2. How do I capture a full-screen screenshot on a Gateway laptop?
A. Press the PrtScn (Print Screen) key. This captures the entire screen and copies it to the clipboard. You must then open an image editor (like Paint) and paste (Ctrl+V) to view or save it. On some laptops, you might need Fn + PrtScn if labeled as a secondary function.
Q3. Can I use the Snipping Tool or Snip & Sketch app to take screenshots?
A. Yes. Open the Snipping Tool app from the Start menu (or Snip & Sketch on Windows 10/11). Click “New” to start a snip, select your capture area, and then save or annotate the screenshot in the tool.
Q4. How do I take a screenshot while playing video games on my Gateway laptop?
A. Press Windows + G to open the Game Bar, then click the camera icon or press Win + Alt + PrtScn to capture a screenshot. This saves the image directly to your Videos/Captures folder.
Last Updated on 1 November 2025 by Misbah Arif

Misbah Arif is a Computer Science graduate and tech reviewer with over five years of experience in laptop hardware and performance testing. As the editor of SavvyLaptop, she focuses on real-world laptop reviews, covering battery life, usability, and value for money. Her goal is to simplify tech decisions through honest, hands-on insights that help readers choose the best device for their needs.
2 thoughts on “4 Ways To Take Screenshot On A Gateway Laptop”